Creating a Prose workspace
To create a Prose workspace, the easiest solution is to first deploy the Community version, but beware that it has a 20 members limit. If you then need more members, you can easily start paying for the Business version and upgrade your Community server setup, without having to re-create everything. For more information, head over to our Pricing page.
Initializing your workspace
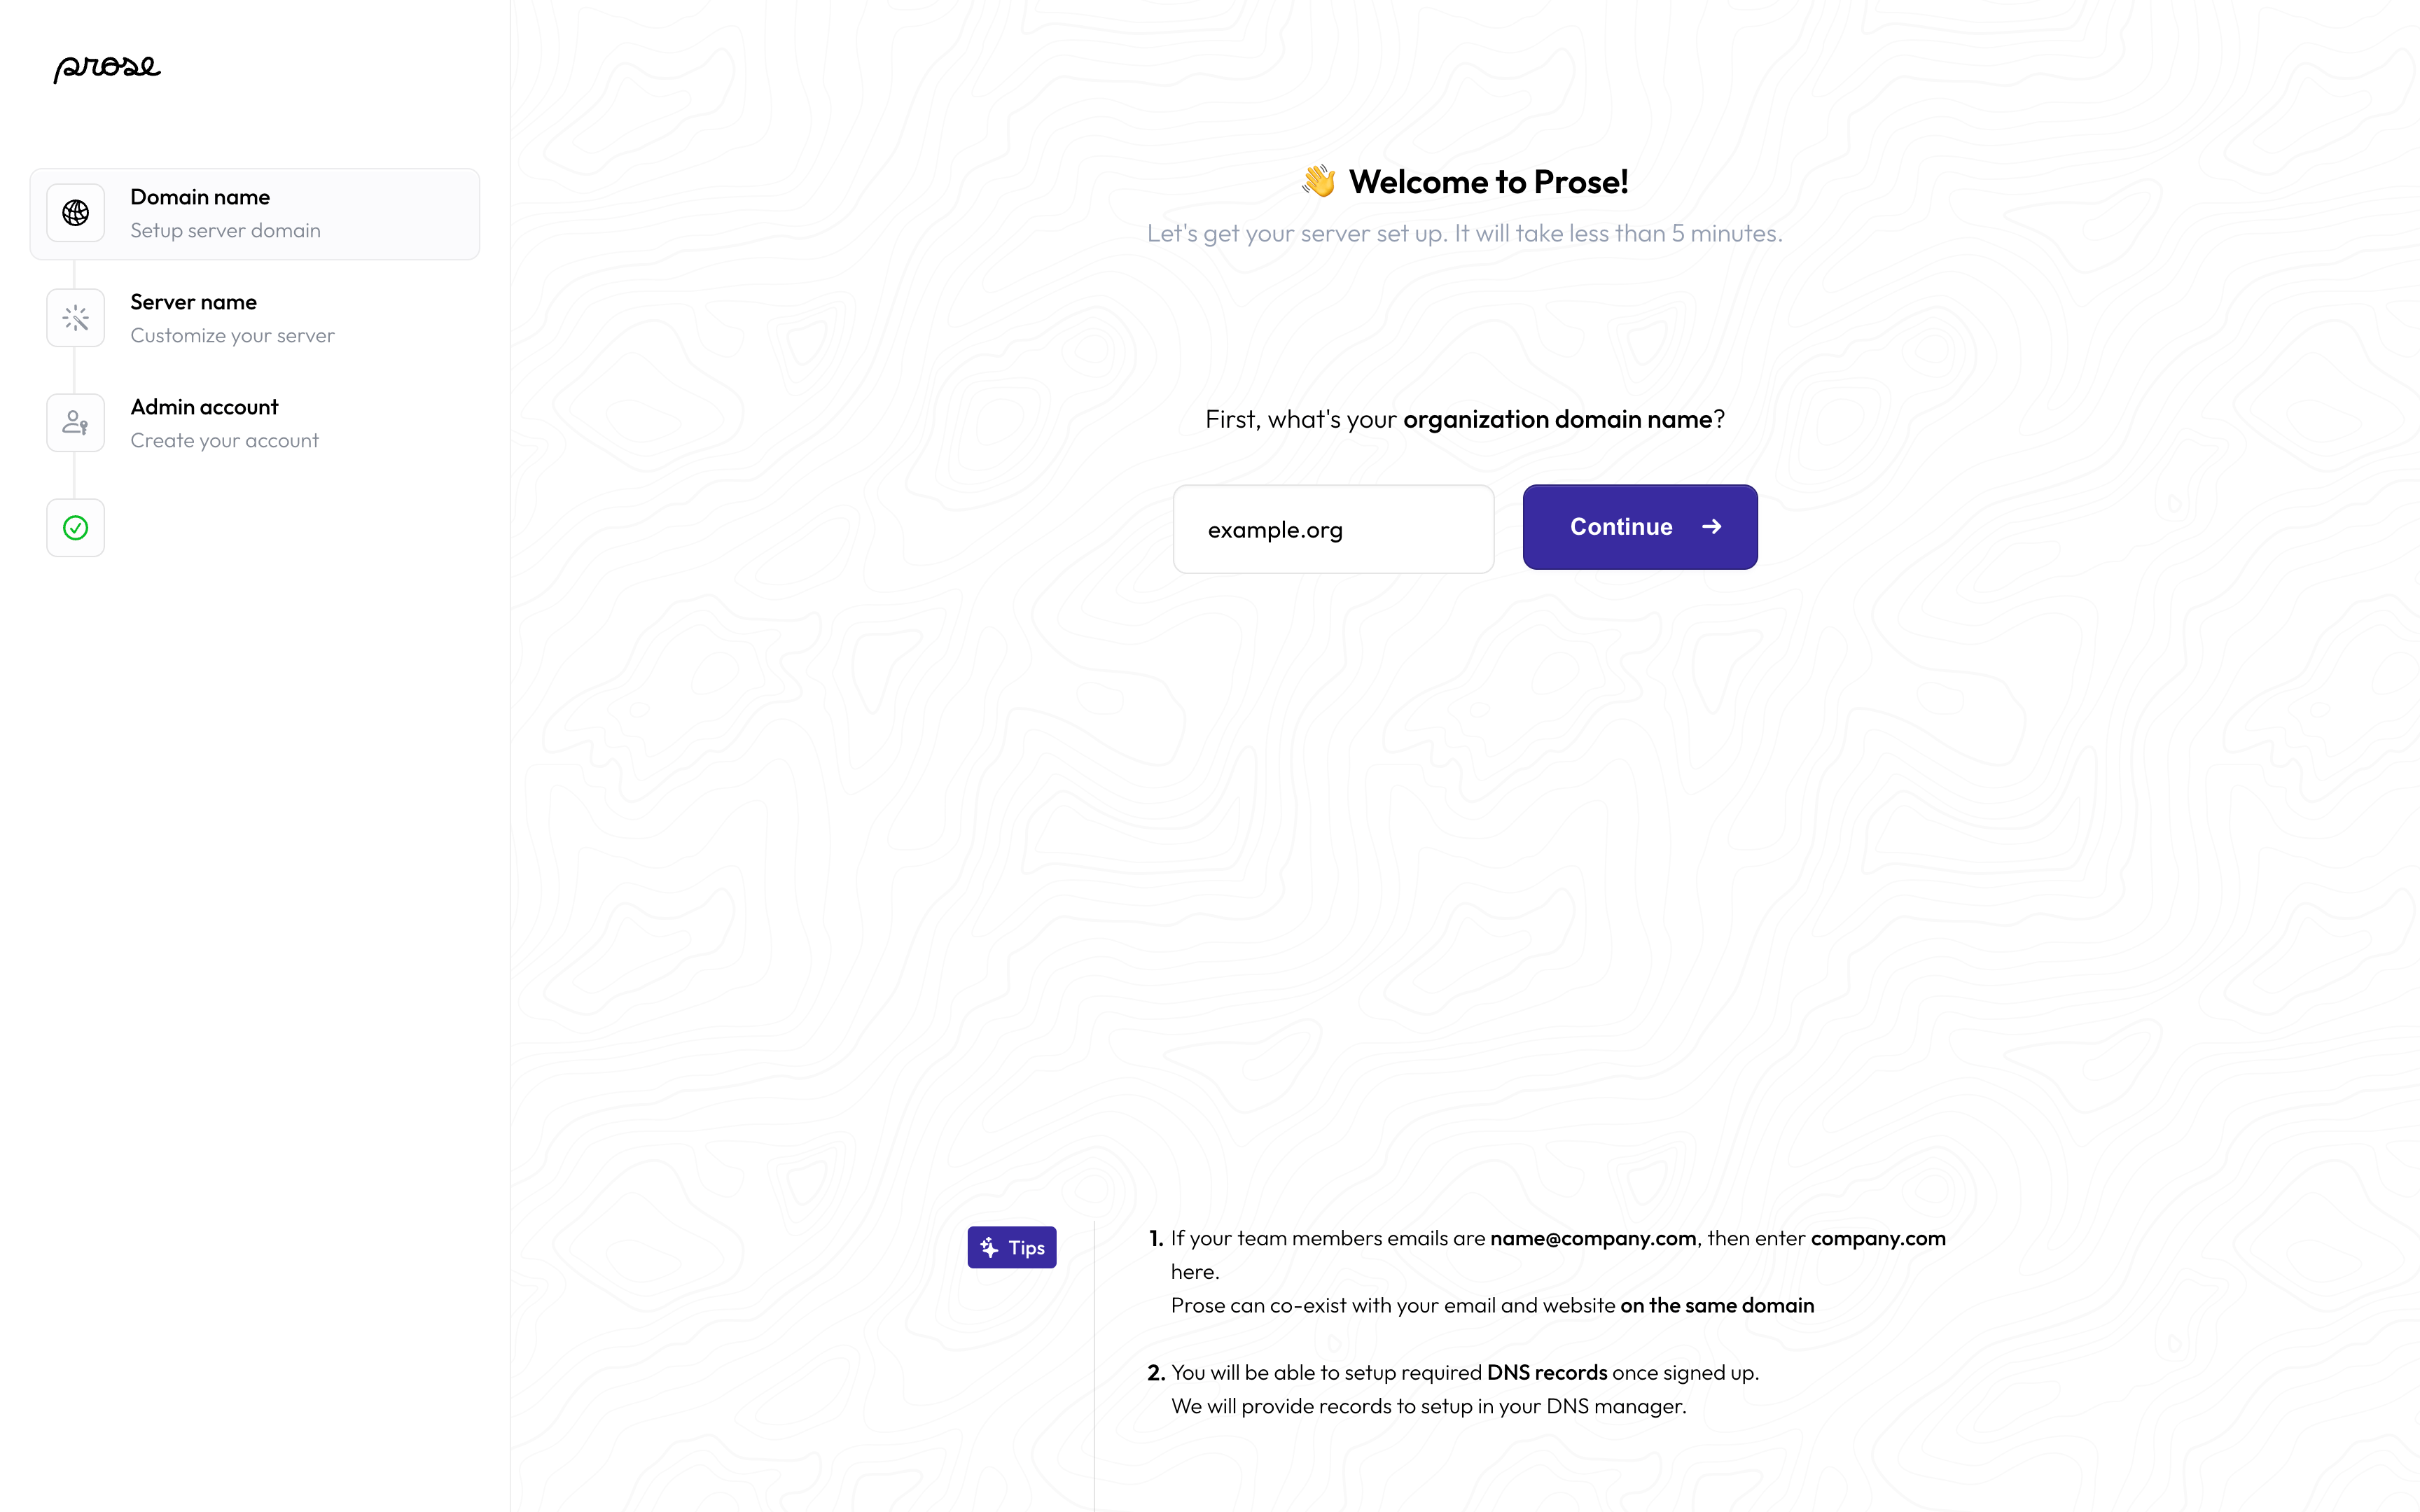
Once we’ve created your workspace, we’ll give you a link to your admin dashboard. The first time you open it, you will be guided through a quick initialization process. This section walks you through it.
Server domain
The first screen will ask you to choose a domain for your instant messaging server. If your team members emails are name@company.com, we recommend you enter company.com in the field.
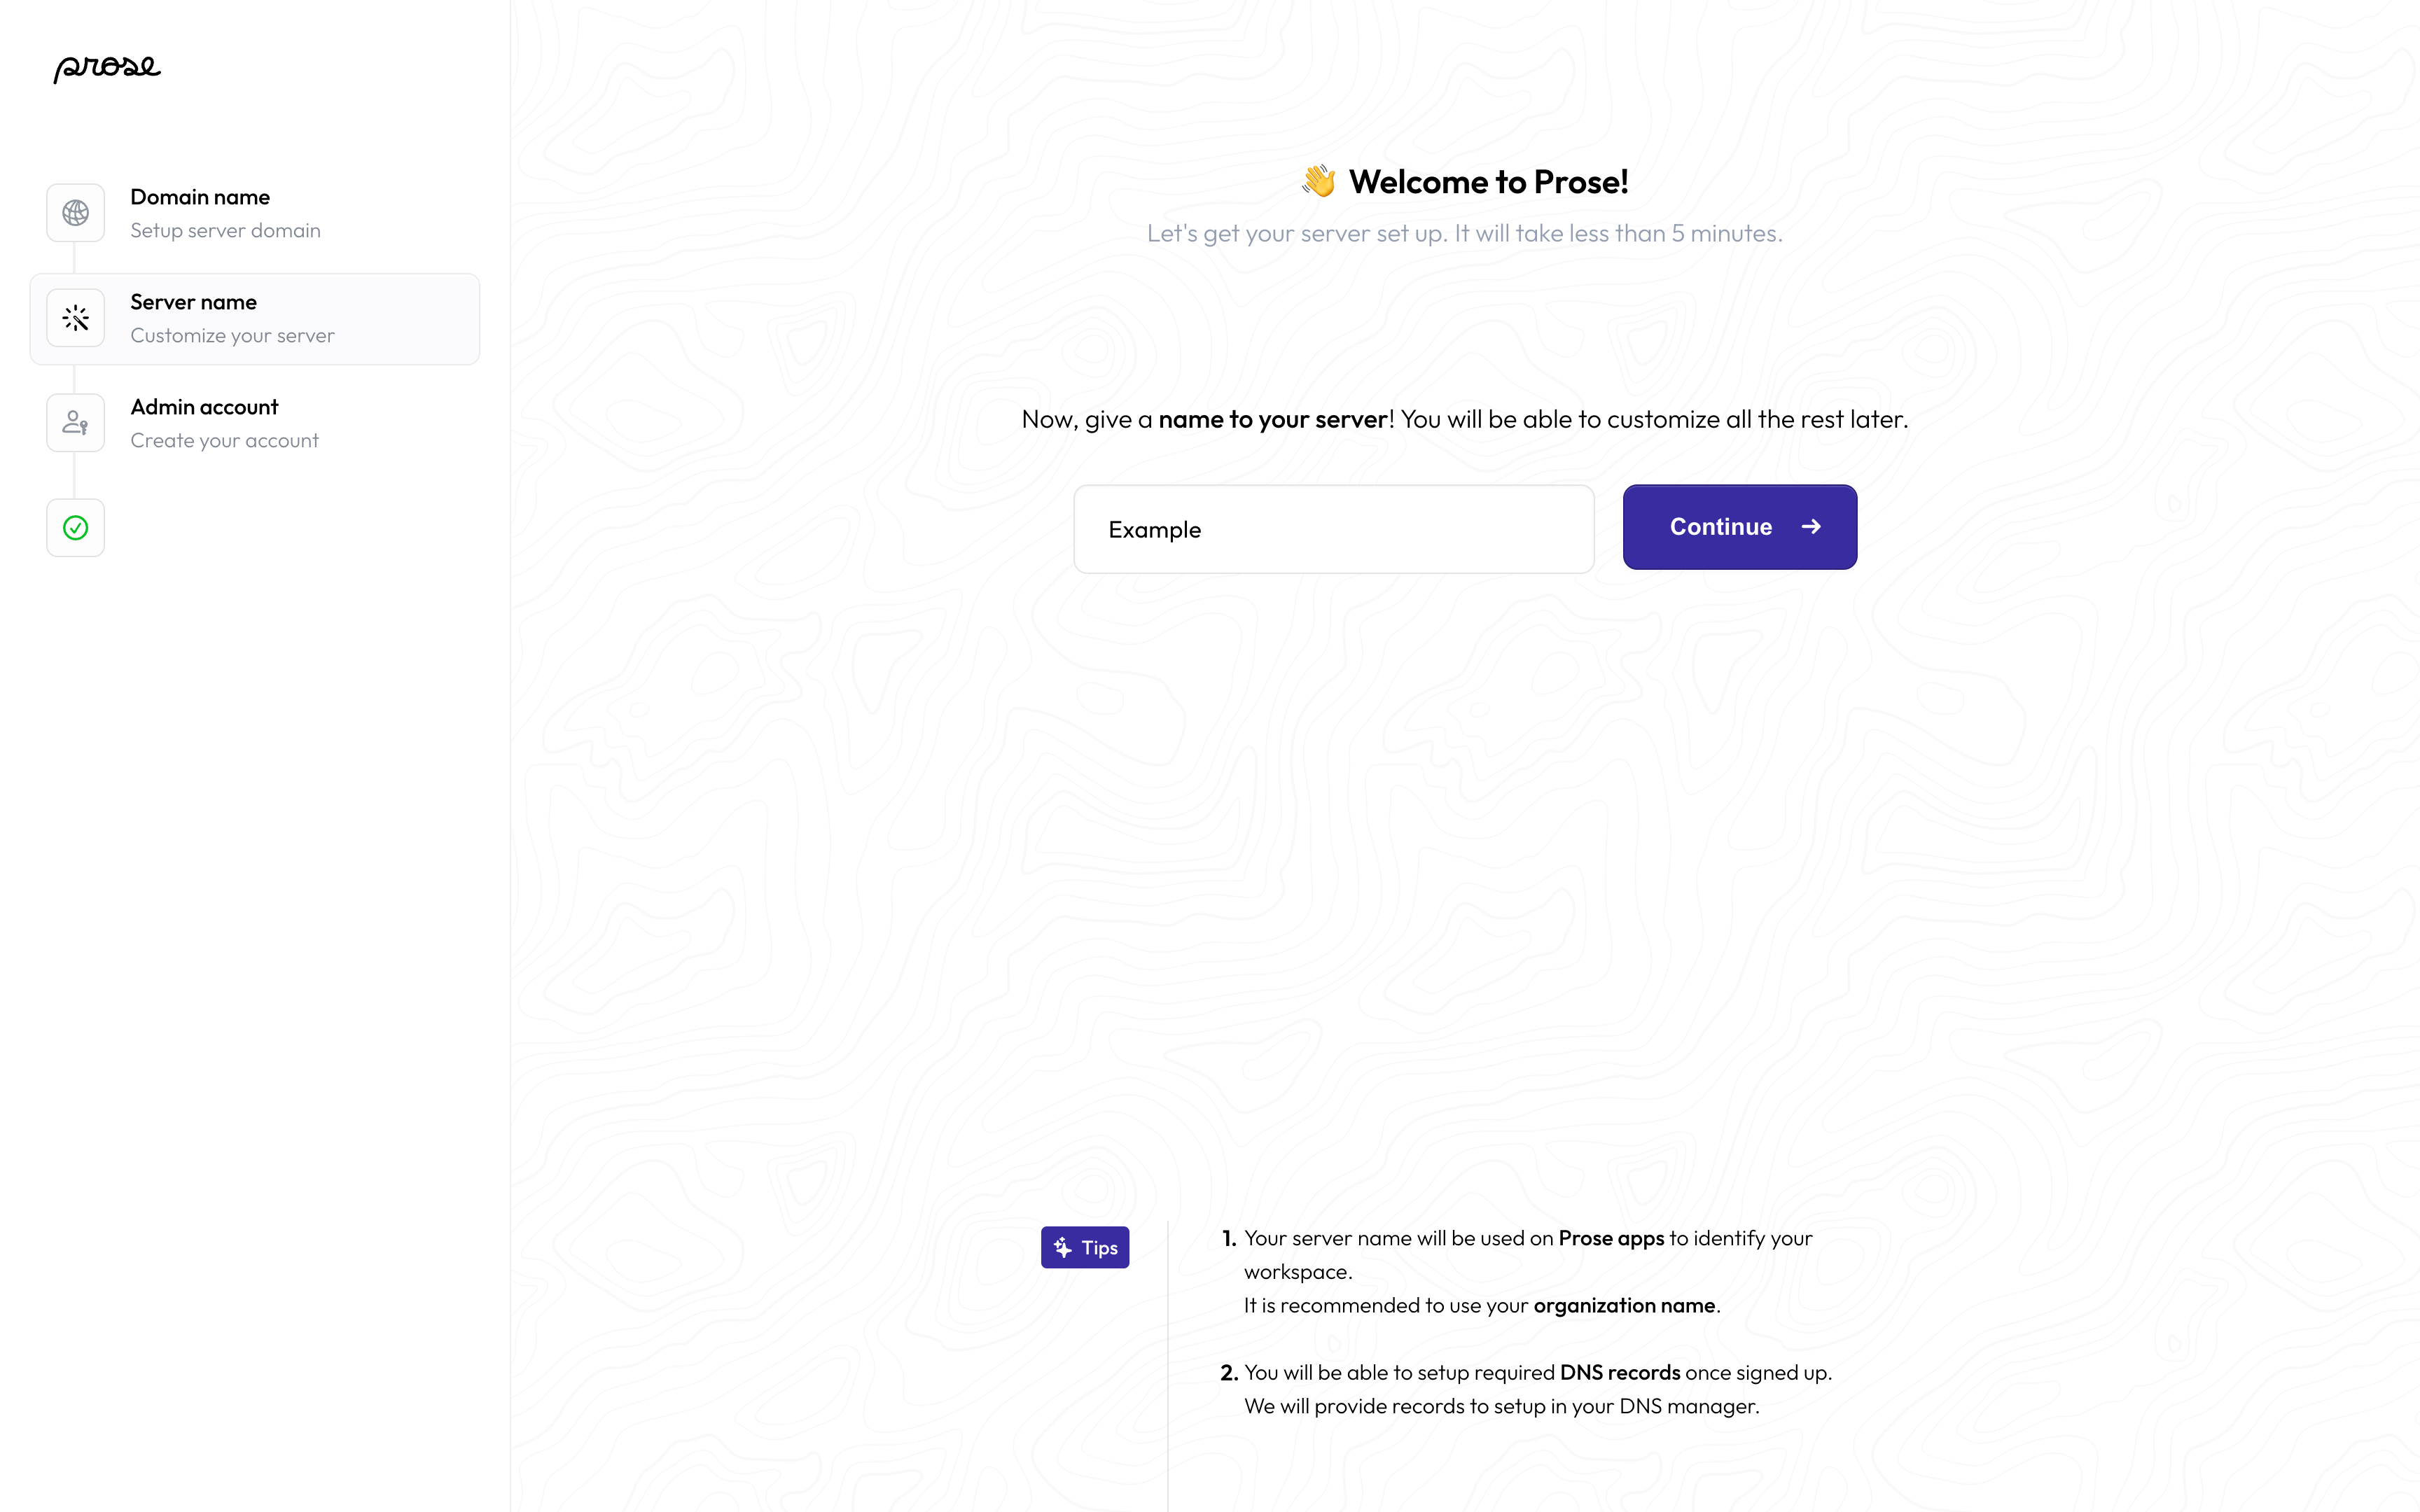
Workspace name
After that, you will be prompted for a workspace name. It will be used on Prose apps to identify your workspace. We recommend using your organization name.
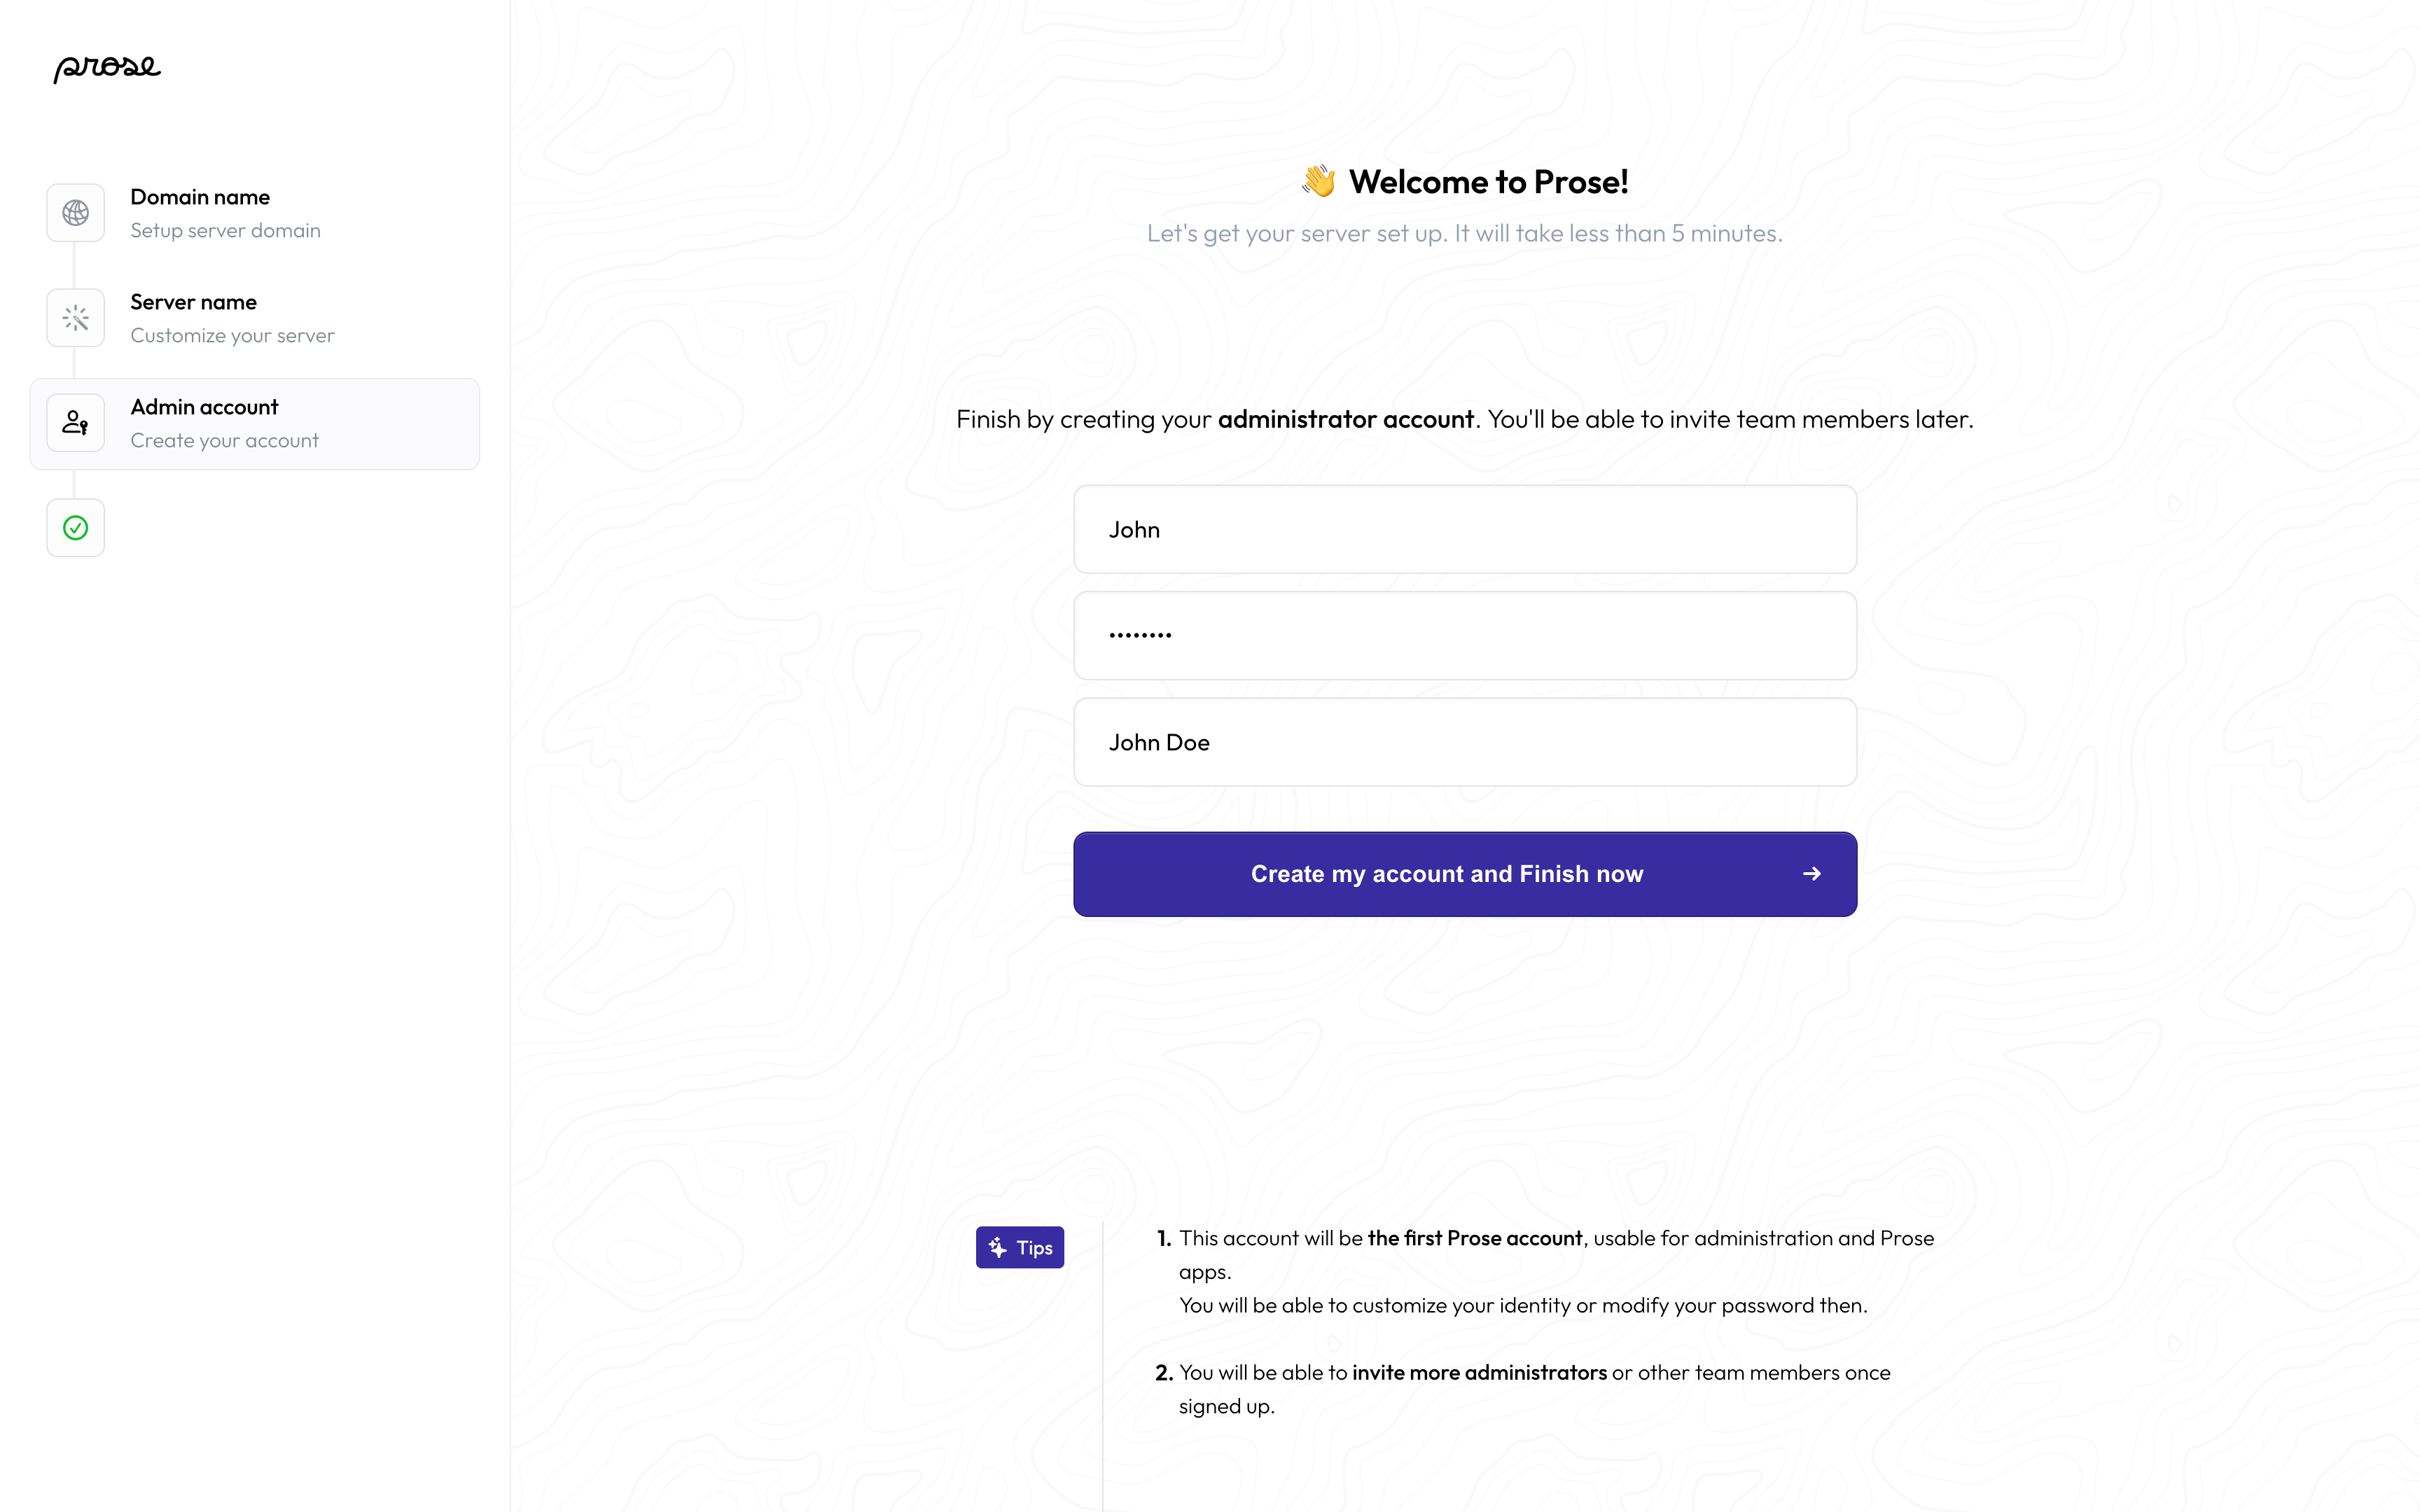
First admin account
Finally, you will be asked for information about the first account you need to create: the initial workspace administrator. Using this account, you will be able to log into the Dashboard to invite users and configure your workspace.
Configuring DNS records
Before you can start using your Prose workspace, you will have to configure DNS records to link it to your domain.
We provide you all the DNS records you need to configure. To find them, navigate to “Advanced Settings” > “Network Setup” then under “Network Setup Tools” click “Show DNS instructions…”.
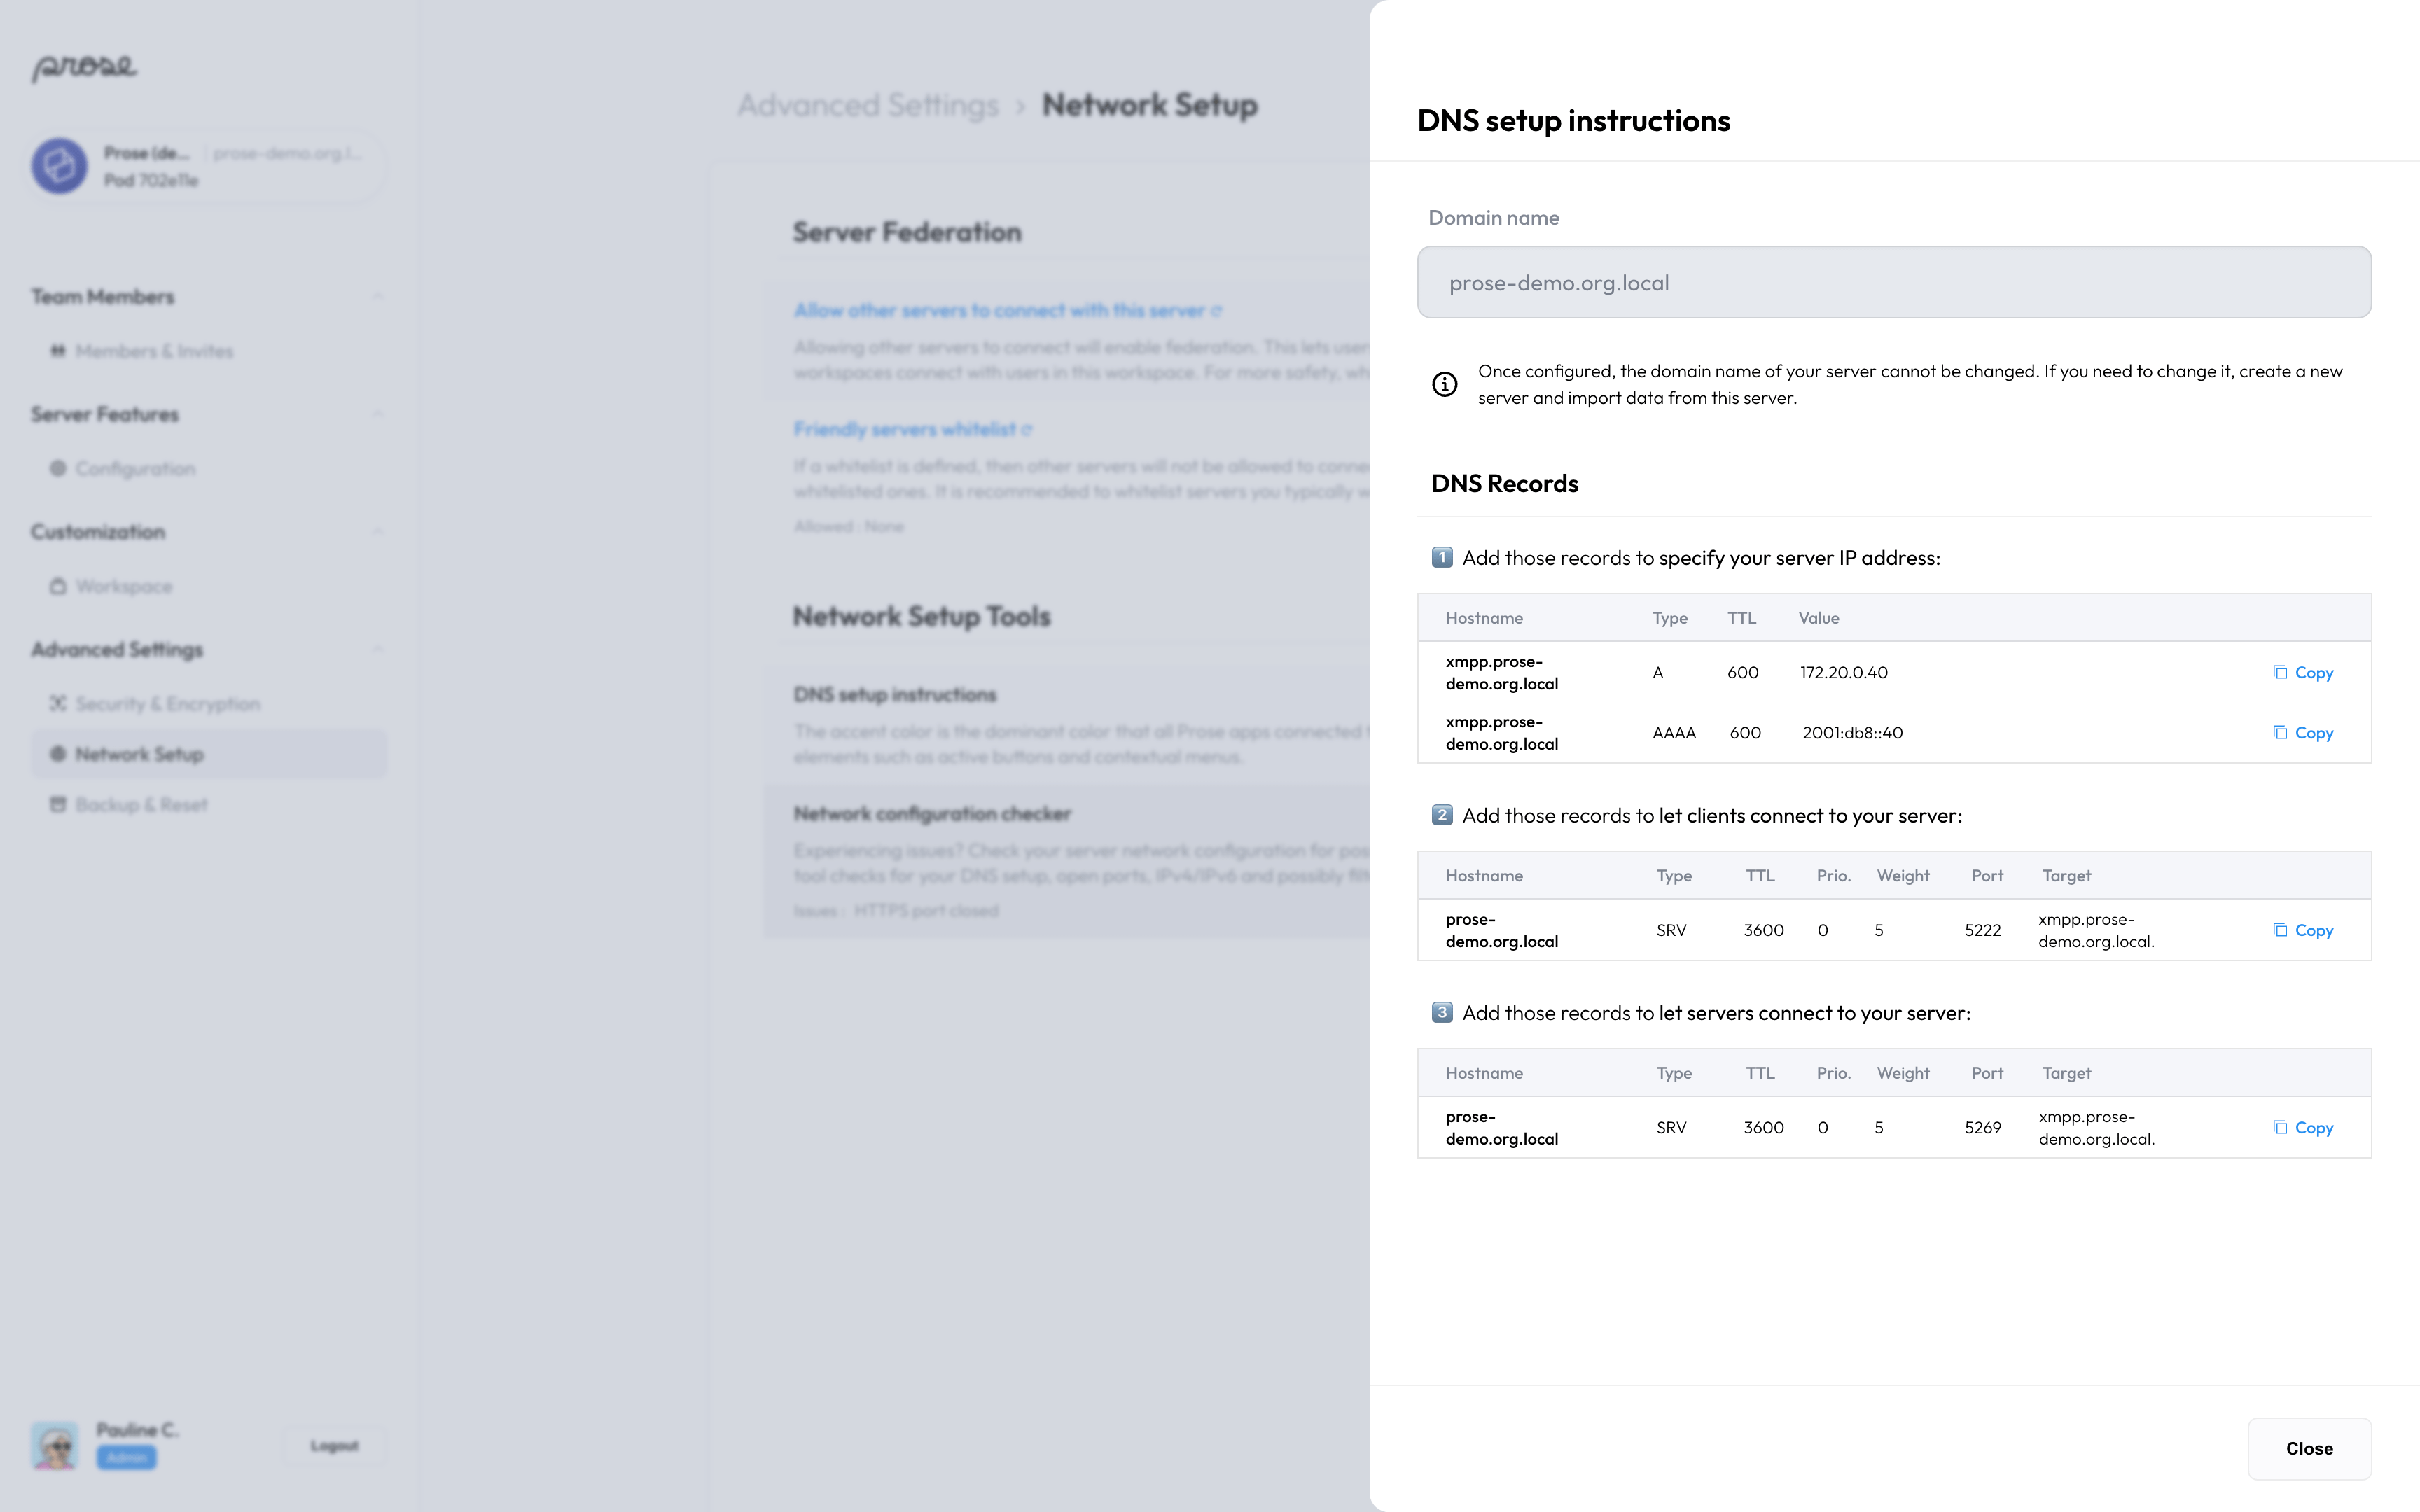
Now log into your DNS provider’s administration dashboard (e.g. Cloudflare, AWS Route 53, Google Cloud DNS, Quad9…) and create the records we give you.
The interface is different for each provider and they’re subject to changes so we can’t give you detailed steps but it should be pretty straightforward.
Ensuring your network configuration is correct
Once you have created all DNS records, close the “DNS setup instructions” pane and tap “Start network checks…”. If you had already closed the “DNS setup instructions” pane, you can find this button under “Advanced Settings” > “Network Setup” > “Network Setup Tools”.
You should then see a screen that runs different network configuration checks and shows what is still misconfigured.

If failed, network checks retry after 5 seconds (or whetever your default_retry_interval configuration is). This means you can leave the pane open, change some configuration and come back to see if it is now fixed.
However, note that network configuration usually takes some time to propagate due to multiple layers of caching in networks. The Prose Pod API tries to run DNS checks directly, but you might still have to wait for clients to connect properly.
Also beware that network checks will stop retying after 5 minutes, to avoid useless retries if you kept the pane open in another we browser tab. In this situation, you can hit the restart button at the top of the pane or close and reopen the pane to reset this timer.
Once all network checks have passed, your Prose workspace is ready to be used 🥳
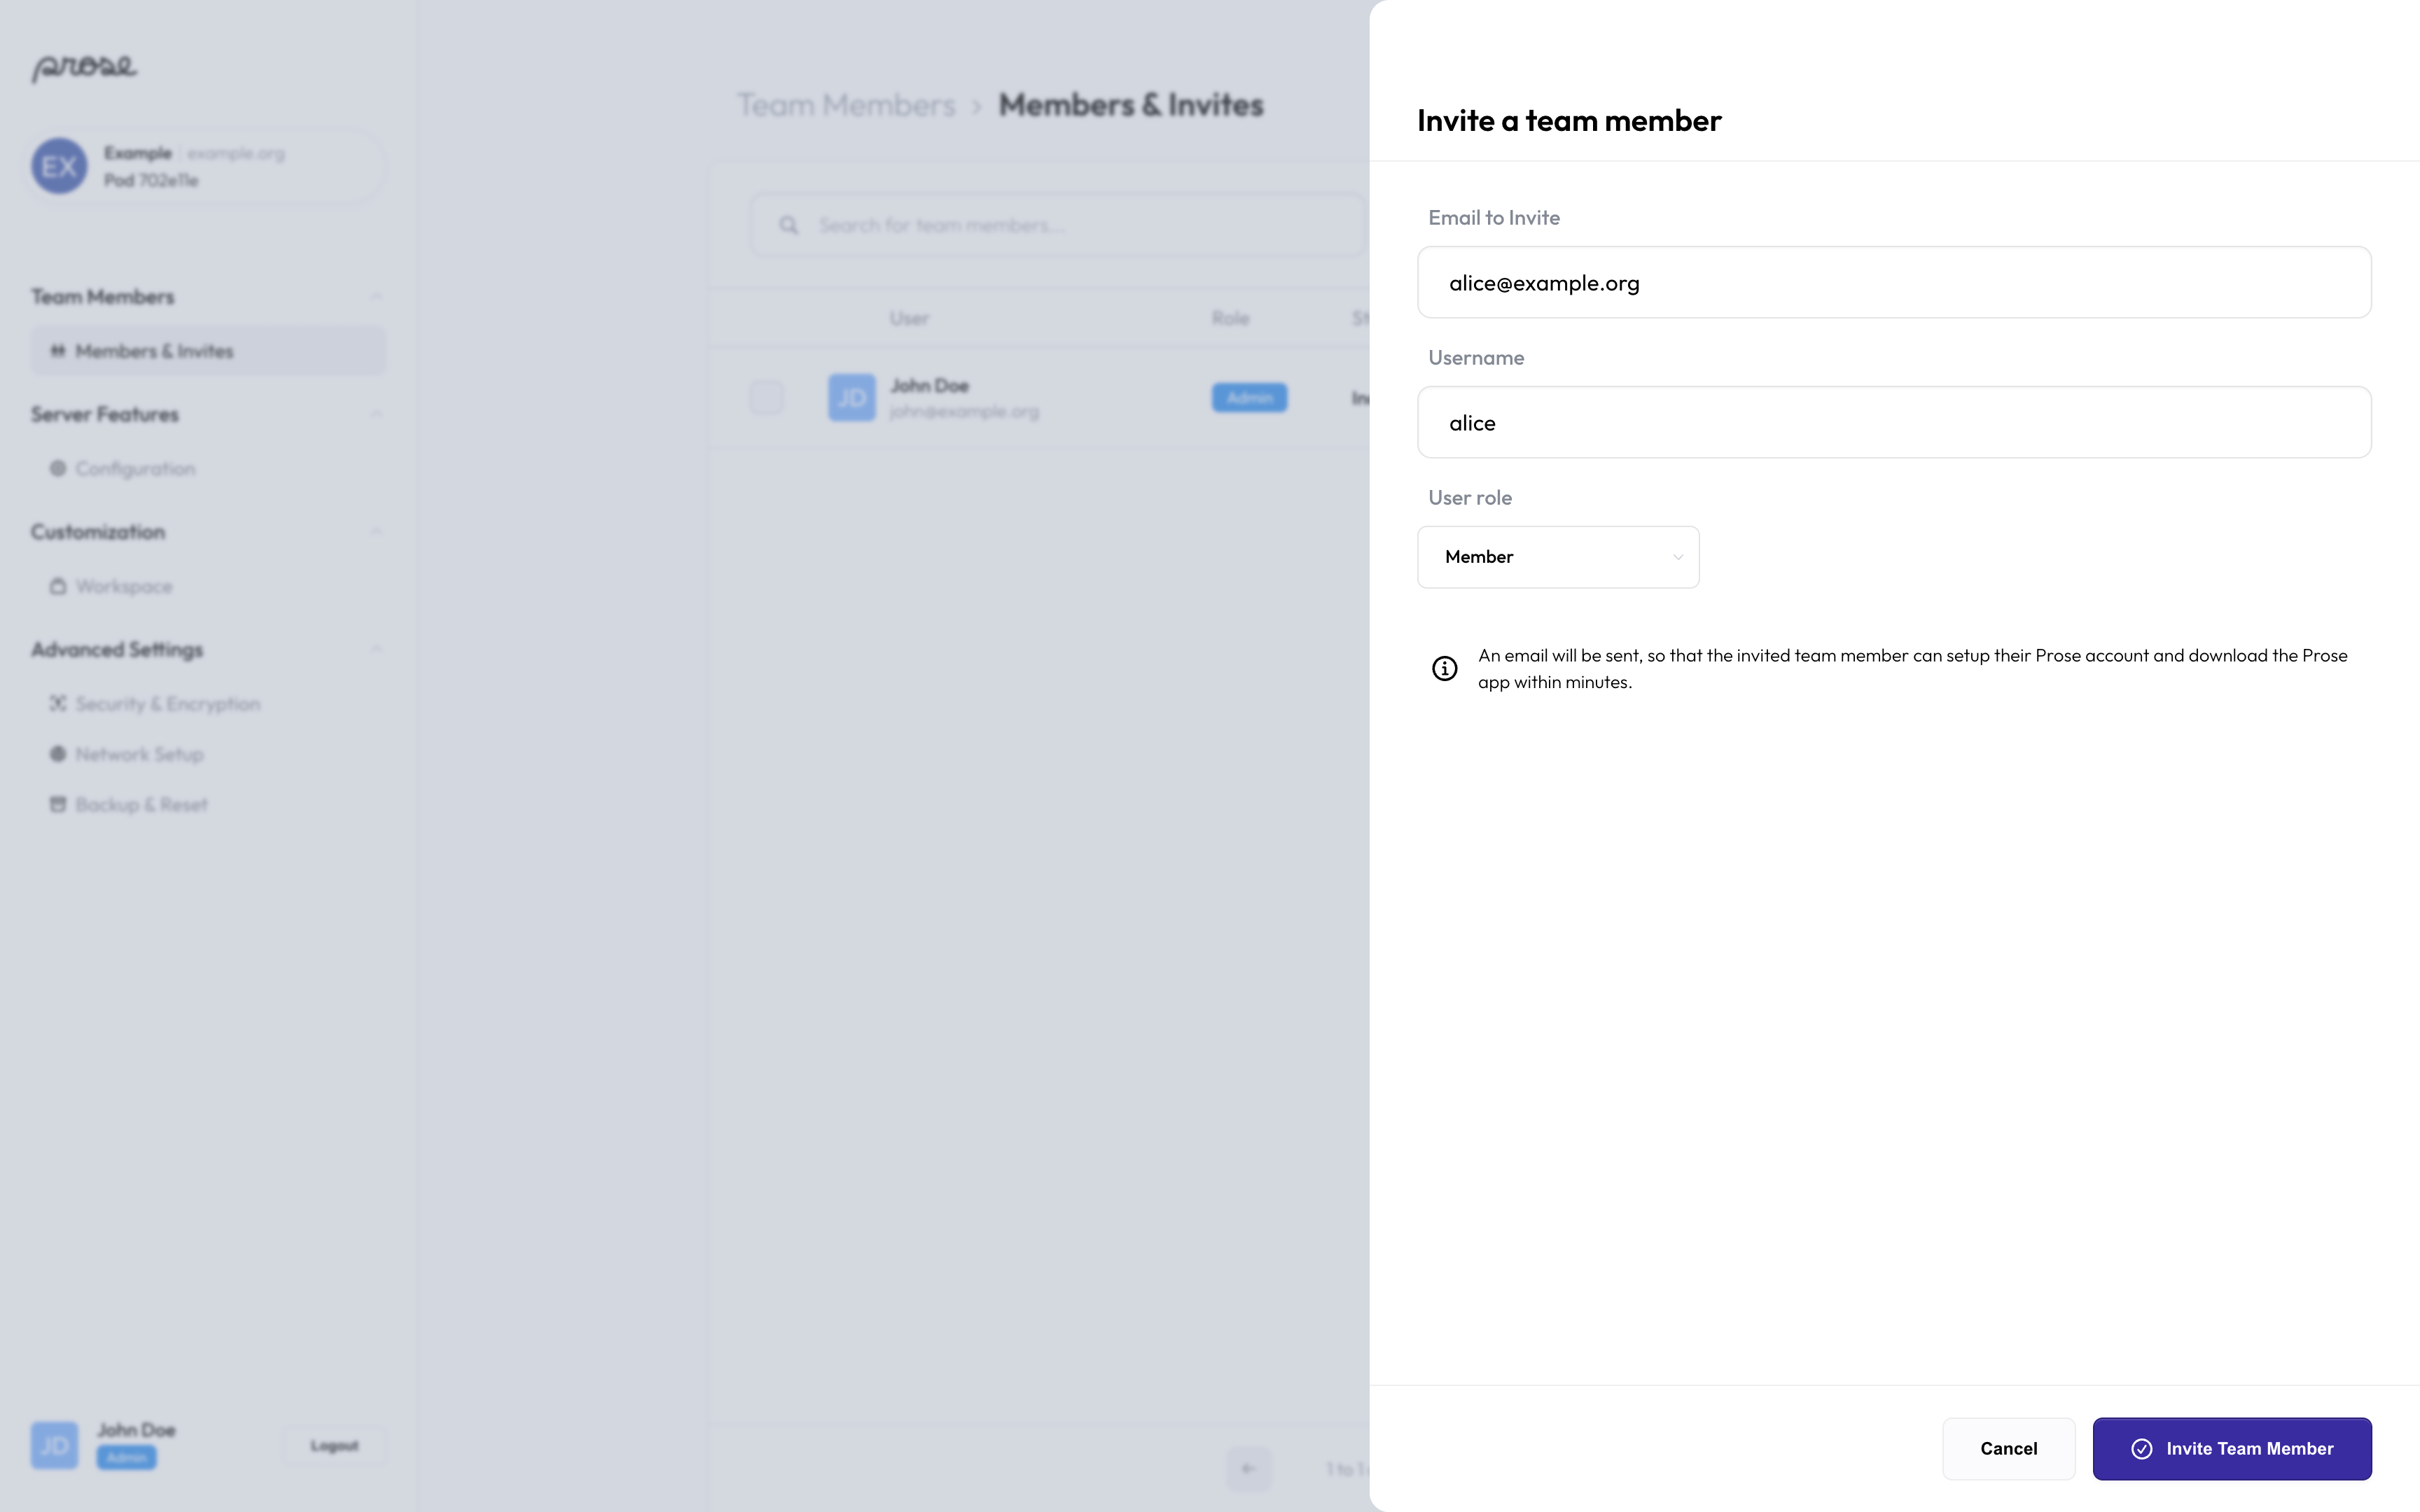
Inviting the first member
After you’ve configured your DNS records and checked that they are correctly configured, it’s now time to invite your first colleague!
To do so, open “Team Members” > “Members & Invites” then click “Add a Team Member” and fill the form.